
Mounting and installing a roof top tent can seem quite intimidating at first. However, it is a straight forward process and requires about an hour or so to complete the instillation process.
Mounting a roof top tent requires a ratchet wrench, the help of at least one friend, a tape measure, and an open space to work on your tent.
While this may seem to be a daunting task at first, I’m here to tell you from experience it is very easy. My girlfriend and I put one on our FJ Cruiser by ourselves and it took me just over an hour. I will walk you through all of the tools you need and what you should consider before and during the installation of your roof top tent (RTT).
How to pick the right roof rack and roof top tent for your vehicle
Before we talk about the steps to setting up your RTT, there are some very important processes to go through before you even think about mounting your RTT!
For starters, do you already have a roof rack or crossbar system installed on your vehicle? If you do, be sure to check the dynamic weight limit (DWL) of both your rack and vehicle roof rating. The DWL is simply the amount of weight the rack can handle while the vehicle is in motion.
So, if your rack has a DWL of 165 pounds, you need to have a tent that is 165 pounds or less. However, when your vehicle is not moving, this is called the static weight limit. This weight is far greater than the DWL and oftentimes is over 650 pounds.
If you’re looking to learn more information about the best roof racks and crossbar systems for RTTs, I have a dedicated article on this topic going much more in-depth on what to look for. Click here to learn more!
Step by step mounting guide
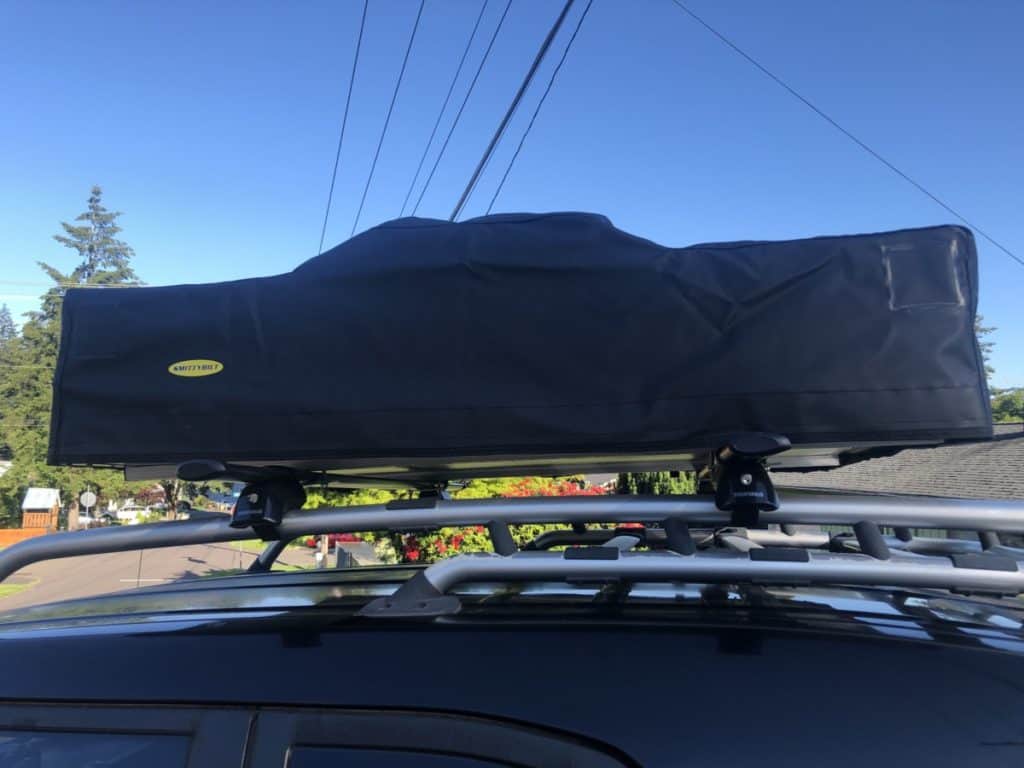
Here are a few pictures that will help you identify each component I refer to when going through each of the steps!
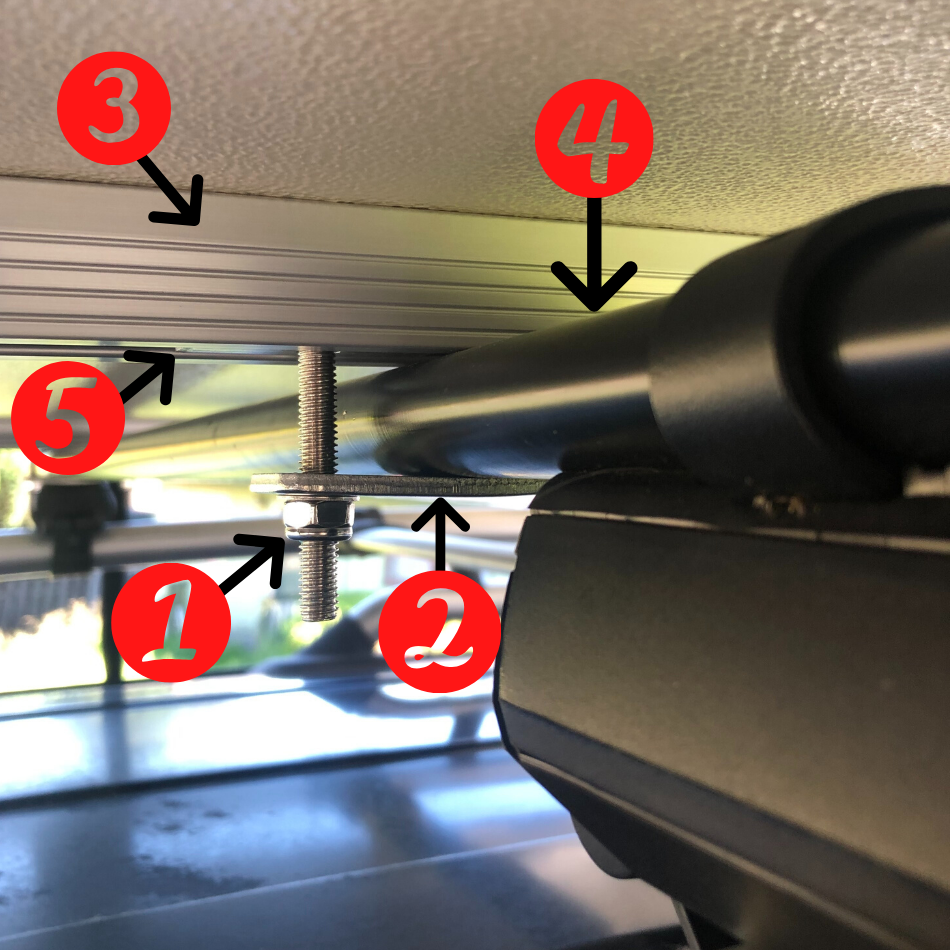
- This is the nut and bolt component which you are probably familiar with. There are eight of these, two on each corner of the tent.
- Mounting plate: you put the mounting plate on and then follow it with a washer and nut before tightening.
- These are the mounting tracks that should run perpendicular to your crossbars.
- Crossbars: you can place your tent on these or a roof rack depending on which type you have. In the picture, mine are Yakima Corebars 60″ (DWL of 165 pounds).
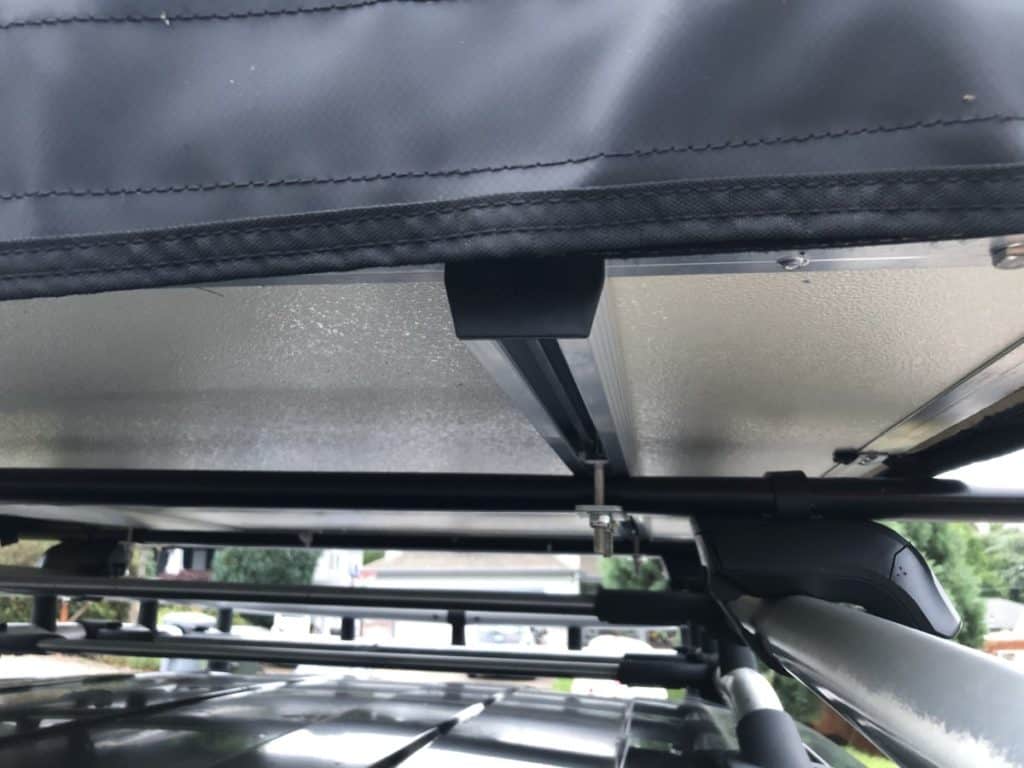
- Sliding mounting brackets: you can see them in the pictures below a bit better. These are plates you slide into the mounting track with the bolt in them, facing downwards.

Step by step roof top tent mounting checklist
- To start, set aside a day for the tent to be delivered or to go pick it up from a warehouse. Once you have the tent in your possession, you should get a ratchet wrench (10mm and 13mm). The tent will come with two wrenches but the process is much faster with a ratchet wrench.
- Move the box to a flat open area where you can mount items to it and open it up!
- Open the tent and check to see if all accessories and hardware have been accounted for. Typically you will see mounting channels, bolts, washers, a ladder, ladder mounting brackets, and mounting brackets for the tent. If you have a softshell you will have a cover for your tent too.
- Double-check the quality of the tent. Make sure all of the zippers and doors work. Ensure there has been no damage to the RTT during the shipping process overall. You would hate to get everything installed and then notice an issue with the tent.
- Your roof rack or crossbar system should be installed at this point. I would make sure the spacing is correct on the crossbars if you have them, refer to your roof rack manufacturer’s recommendation for proper spacing measurements. If you have a softshell RTT, you can decide if you want the tent positioned so it will open up to the side or back of the vehicle.
- Next, you will secure your mounting tracks to the base of your tent using bolts and nuts. Undo the nuts from the bolts, line up the mounting tracks with the predrilled holes, and screw them into place with your ratcheting wrench. You should have 4 holes, two for each mounting track to secure.
- Once that is done, you will mount your ladder to the tent using a similar process. Take your ladders mounting brackets and set them over the precut holes. Then place your ladder over the mounting brackets and screw the nuts off of the bolts. Use the bolts and nuts to secure the ladder to your RTT. Make sure the ladder is straight and swings back and forth without a hitch.
- Now you will close the tent up, pack all of the fabric into the sides of the tent, and secure the straps around the tents.
- This is the fun part! Now you get to move the tent and place it on your vehicle. I would recommend a minimum of two people for this step. My girlfriend and I got our Smittybilt Overlander installed by ourselves but it was a stretch to say the least. Slide it onto your roof rack and center it to the crossbars as best as possible. The mounting tracks and crossbars should be perpendicular to one another!
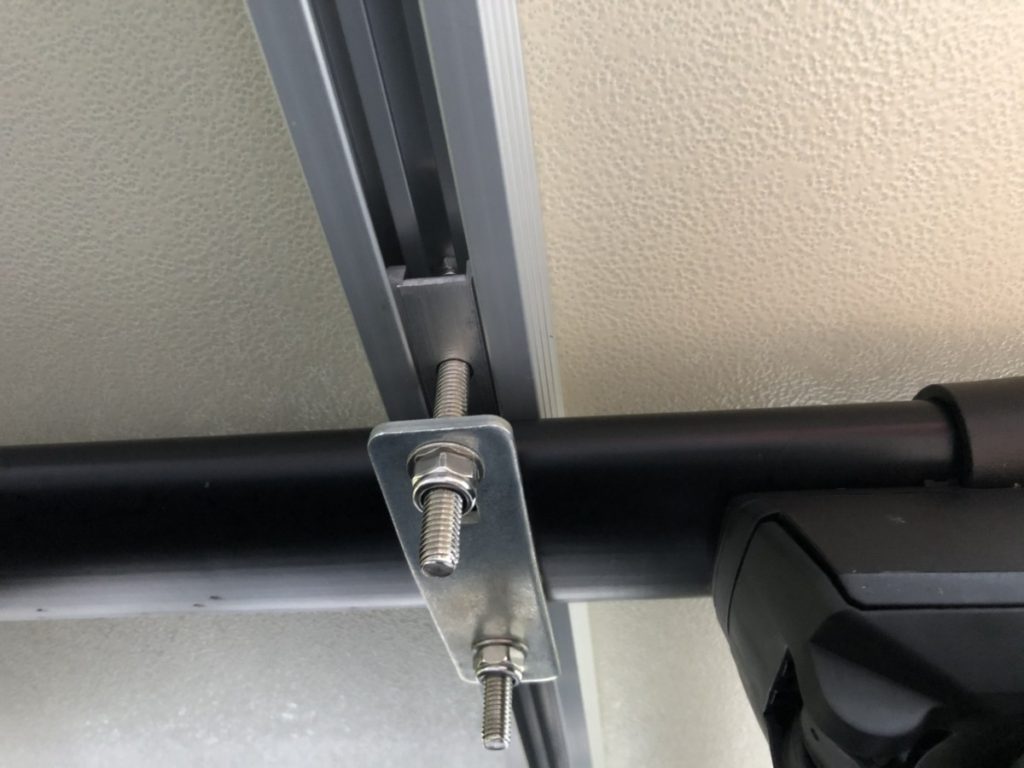
- You should have 8 sliding mounting brackets, two for each point of contact the tent has with the roof rack. Unscrew the nuts from the bolts and place the bolt into the holes in the sliding brackets. Now you will take your sliding mounting brackets and slip them into the mounting channels with the bolts facing down. You will have to pick up a corner of the tent to get one of the sliding mounts on each side of the crossbar. You will do this for each corner of the tent. Then take the mounting plate and line it up to the two bolts, secure it using the nuts, and tighten by hand until you can let it go. Now, you simply fasten the nuts with your ratchet wrench and tighten them until you see a slight bend in the metal mounting plate. Repeat on all four sides.
- Now put the end caps for the mounting tracks back onto the ends and you’re all set!
Those are all of the steps to properly setting up your RTT, wasn’t that easy?
How much do roof top tents weigh?
You also need to consider the size of your RTT and which vehicle type you have. If you drive a sedan or hatchback, you’re going to be limited to tents weighing around 100 pounds and only able to fit two adults. Whereas large SUV’s and trucks can pretty much accommodate any RTT!
When looking to buy and then install a RTT, you should know what the exact weight of the tent is. I compiled over 20 of the most popular RTTs and put them into an easy to read table detailing there weight, person capacity, and which vehicle types they fit on! Click here to see the weight comparisons of the most popular RTTs!
Positioning the roof top tent properly
You can position the RTT more towards the back or front of your roof rack depending on your preference. Some people like having the tent more towards the front so they can have gear stored behind it. Others need it to be all the way towards to back of the vehicle so it can open to the back and clear the vehicle.
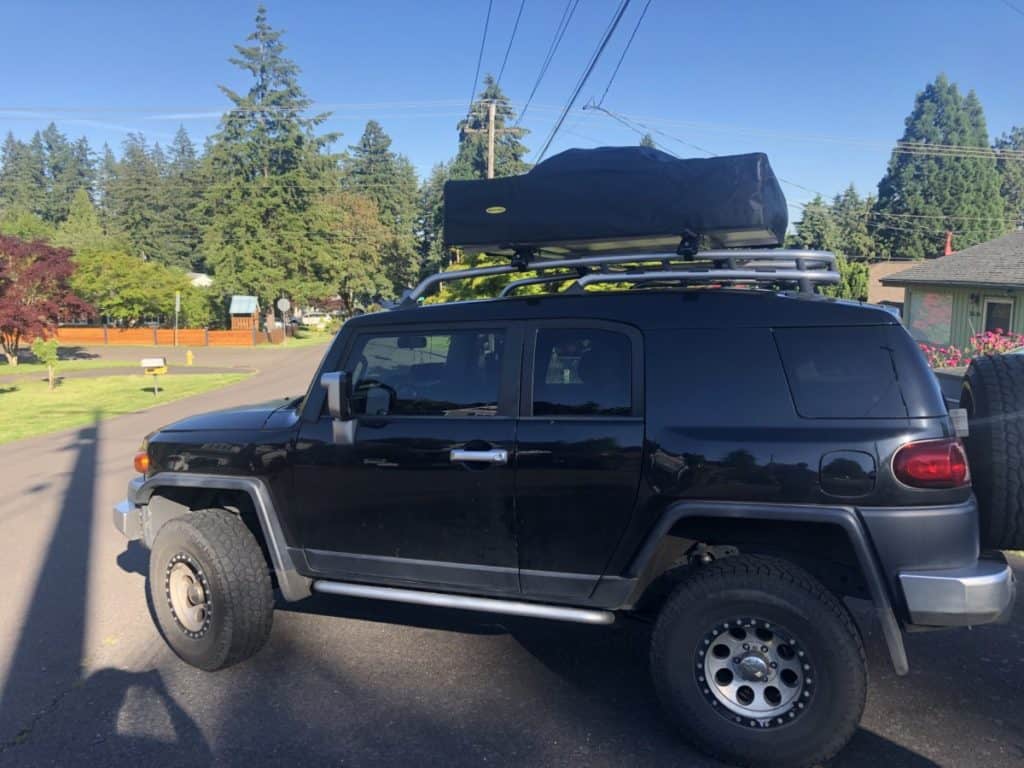
I would suggest placing the RTT as close to the center of the vehicle as possible. This will help maintain the natural weight distribution of the vehicle. Doing so will help prevent losing gas mileage while maintaining a smooth and safe drive!
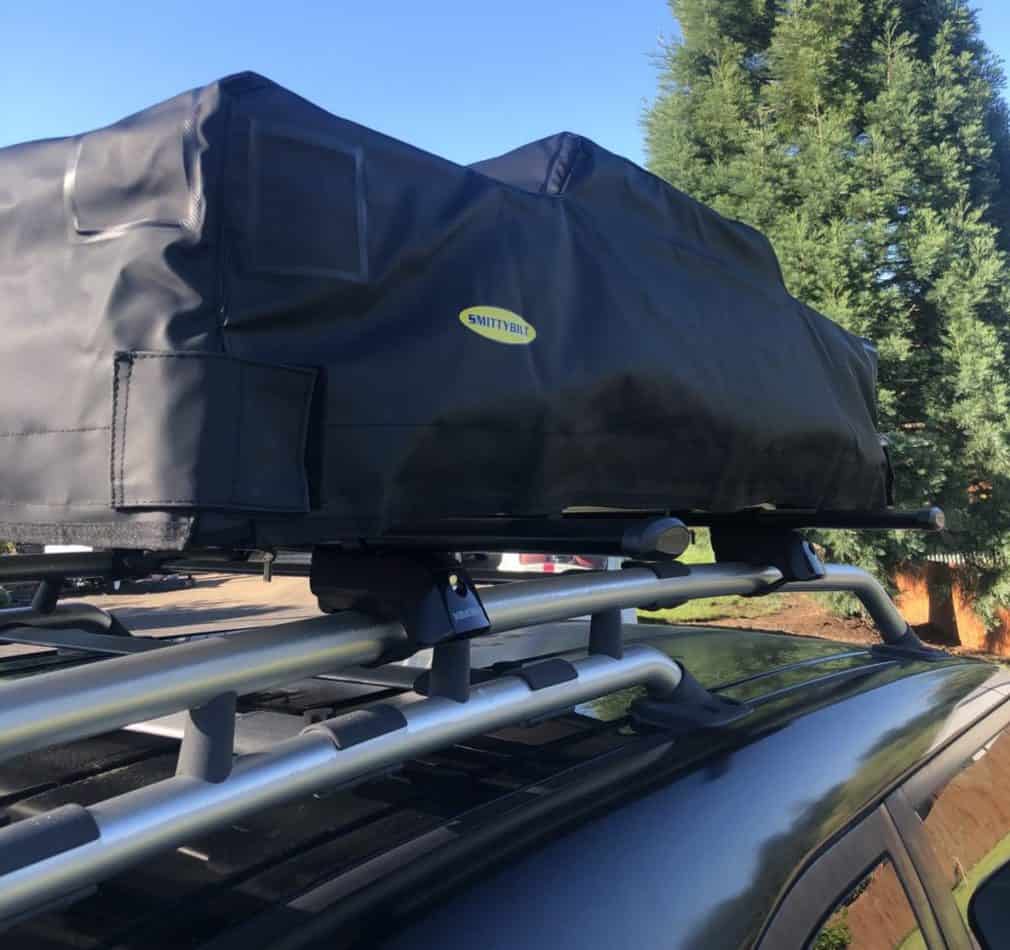
Here is a picture of my personal set up. As you can see, I have placed the RTT fairly in the center of the vehicle. If I moved it more either way, the tent would’ve been unlevel due to the curved side rails my crossbars sit on.
Roof top tent placement
You can mount an RTT to many places rather than just the roof of your vehicle. If you have a truck, you can get a rack for your truck bed, which is what many campers prefer. You can also put it on top of your canopy if you have a camper shell attached.
RTTs are also commonly put on overlanding trailers like CVT’s or FSR’s model. These come with crossbars included, sit much lower to the ground, have tons of attachment, and can easily be unhooked from your vehicle so it doesn’t kill your gas mileage when not being used.
Wrapping up
While each RTT is slightly different in their size, weight, and mounting brackets. The general principles apply to all types of roof tents. After you do it once, the process will only be easier and easier for you as it becomes second nature.
I would also recommend looking up an installation video on Youtube for your specific RTT model. While the general steps are similar, the components that come with the tent will vary ever so slightly. You are now ready to mount and install your RTT, isn’t it simple?